How to create a Google API key for Google Overlay
1) Go To https://console.developers.google.com
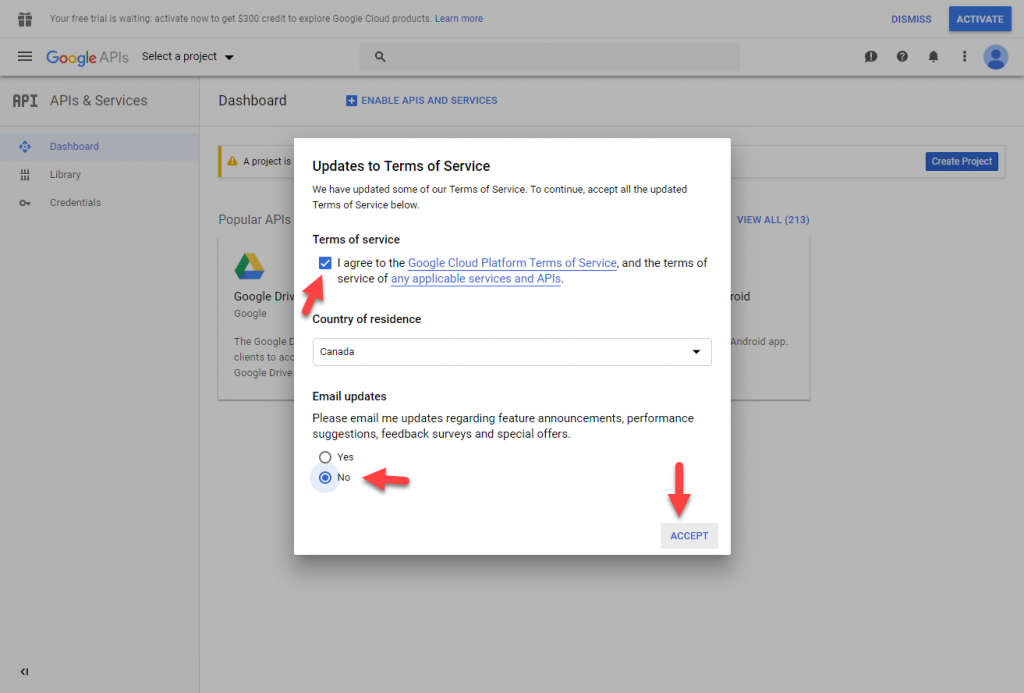
2) Agree with the Term of Service
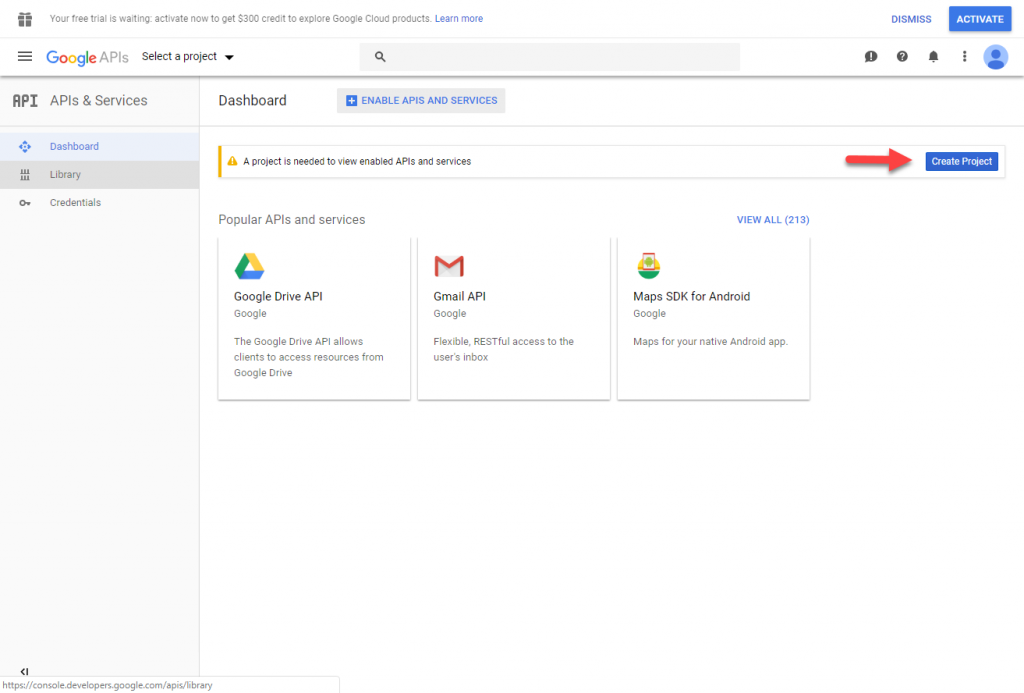
3) Start creating a project by clicking on “Create Project” button
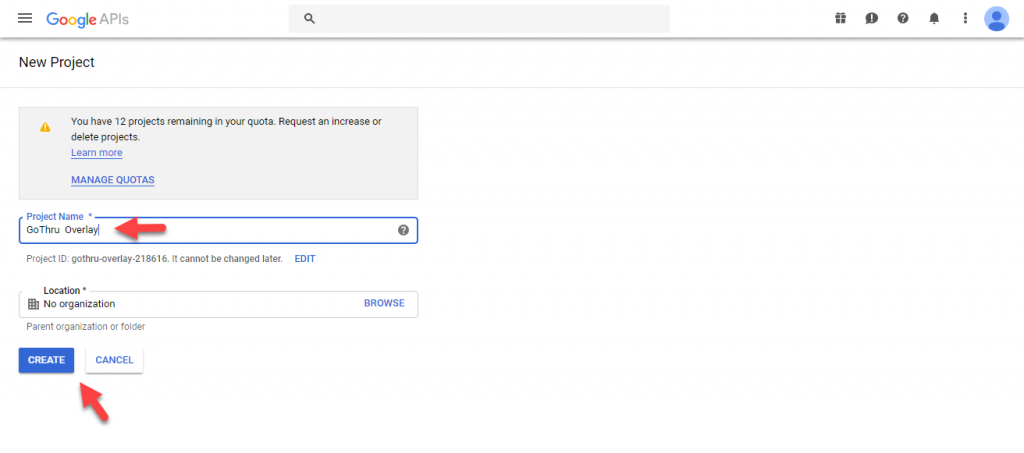
4) Google will generate a project name for you, if you want you can change that project name to “GoThru Overlay”
5) Create the project by clicking on “Create” button
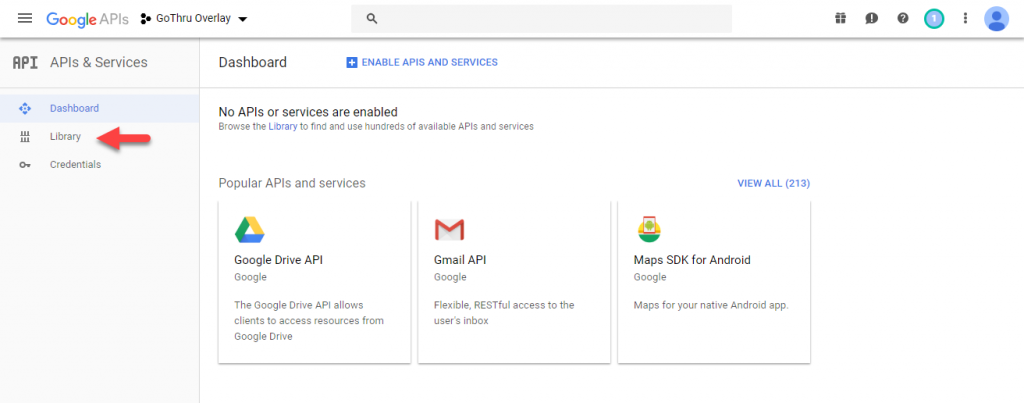
6) Start adding Maps JavaScript API to the newly created project, by clicking on “Library”
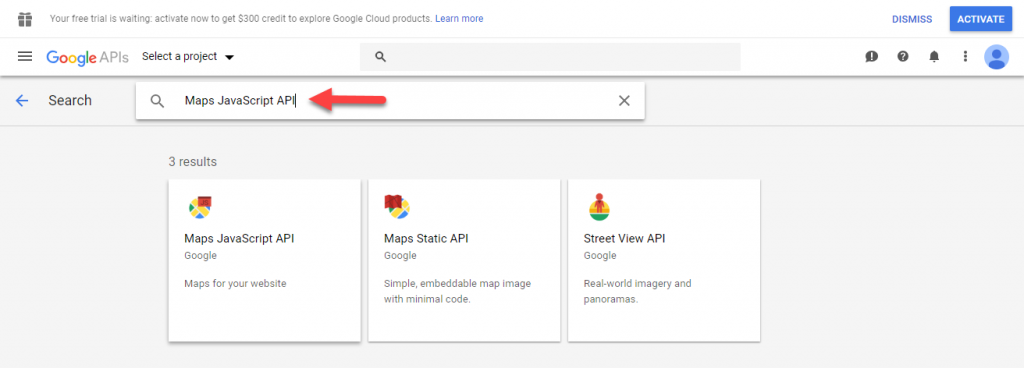
7) Search for Maps JavaScript API
8) Click on Maps JavaScript API
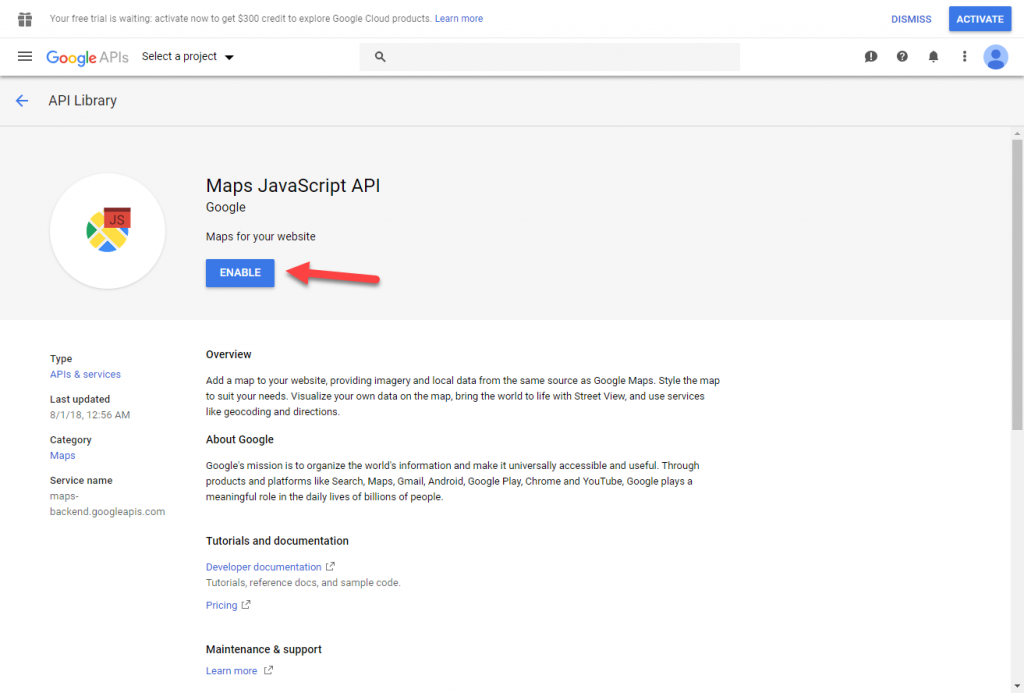
9) Activate the API, by clicking Enable
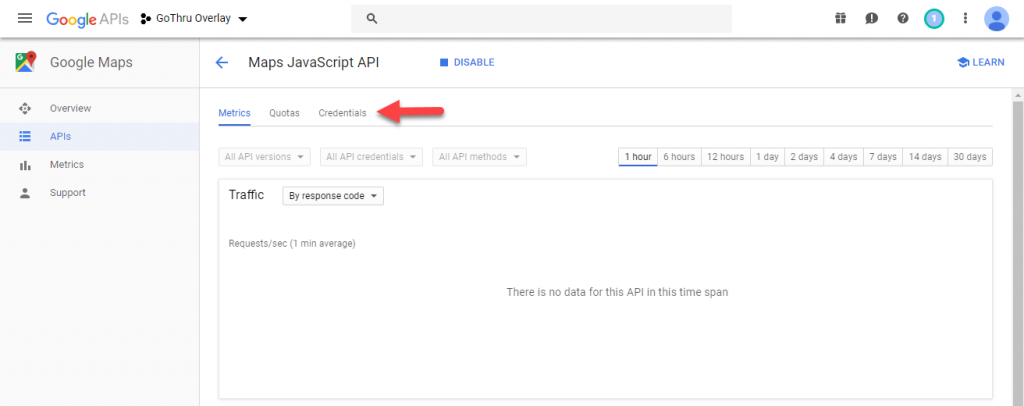
10) Start creating an API key by clicking on “Credentials”
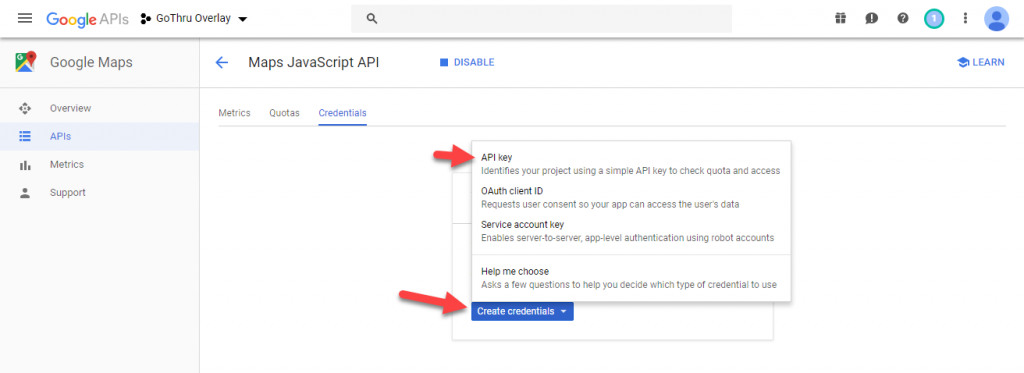
11) Select the API key type, by clicking on “Create credentials” and then “API key”
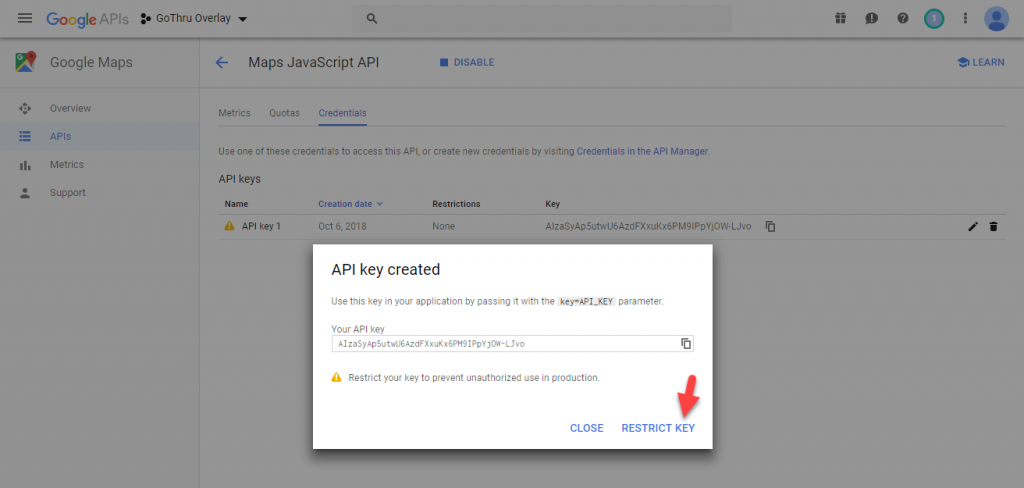
12) Start the process of restricting the API key
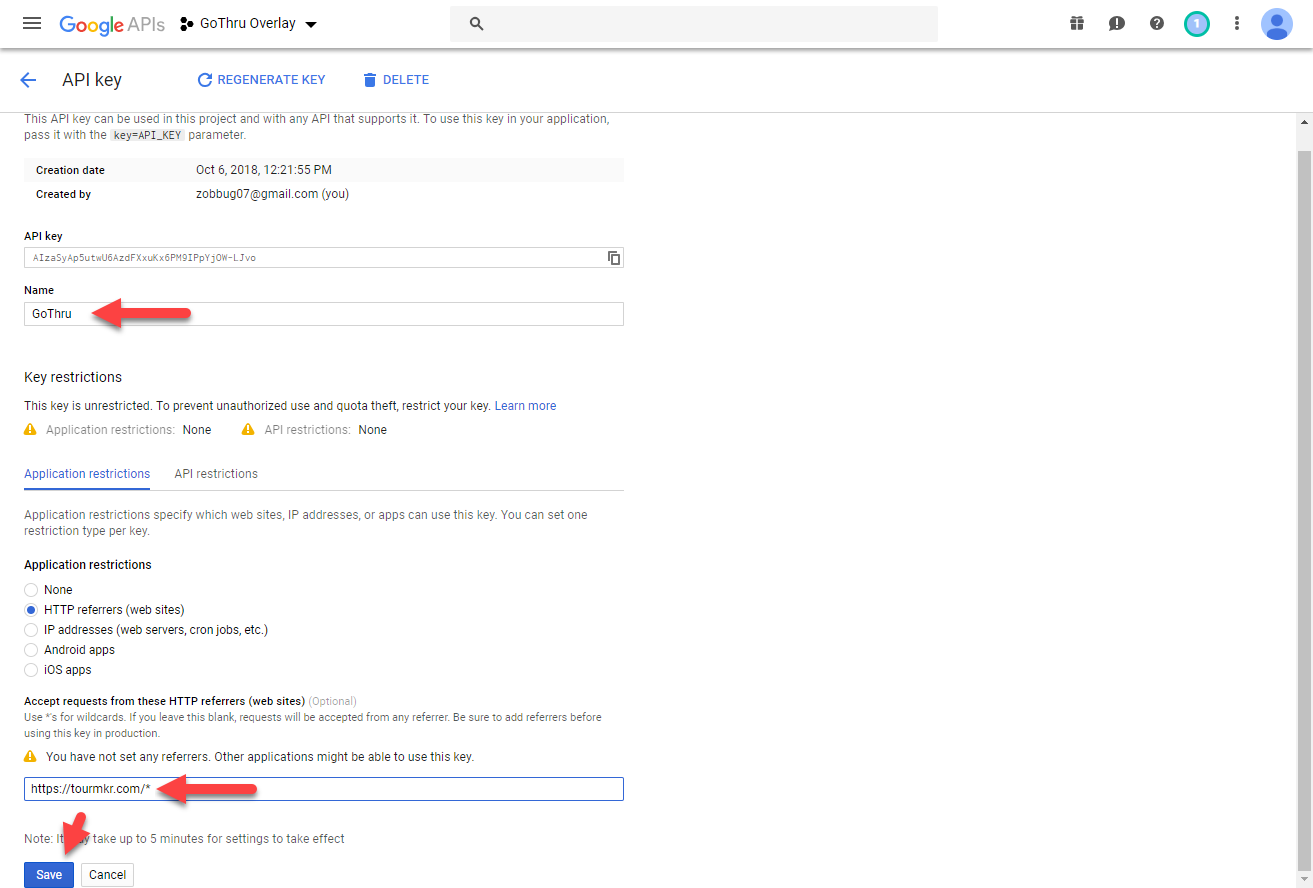
13) Add a name for your key
14) Restrict the API key to HTTP referrers, by adding https://tourmkr.com/*
15) Click on “Save” to finish the process
16) Start the process of linking a Credit Card to your Project

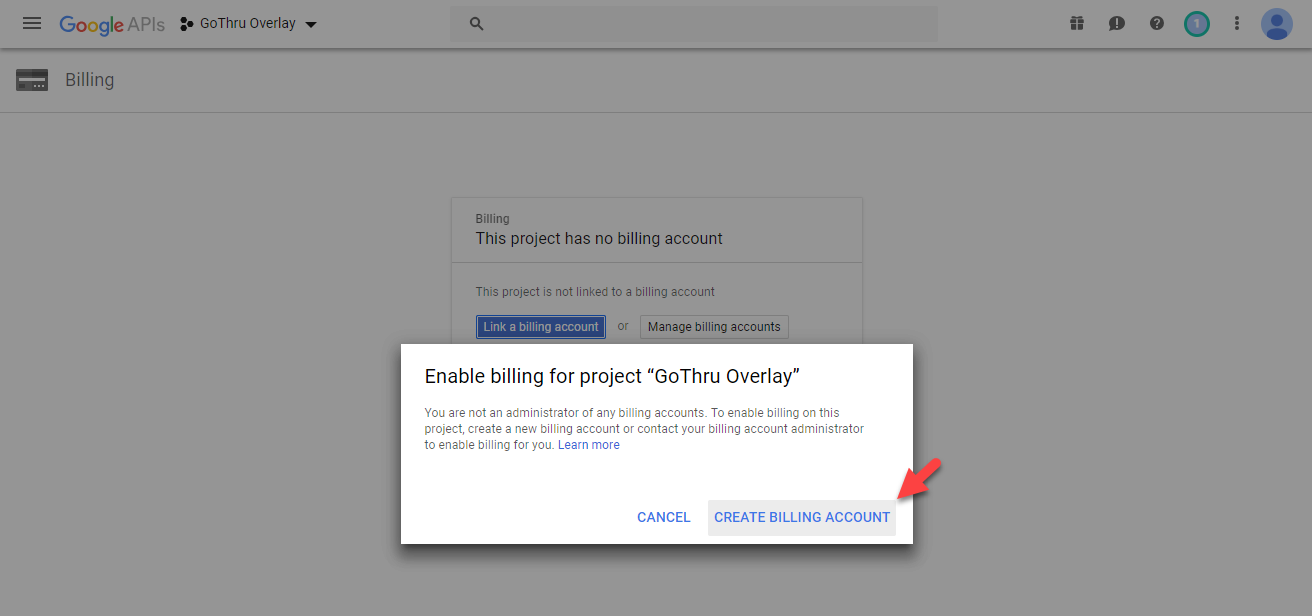
17) Click on “Billing”

18) Click on “Link a billing account”
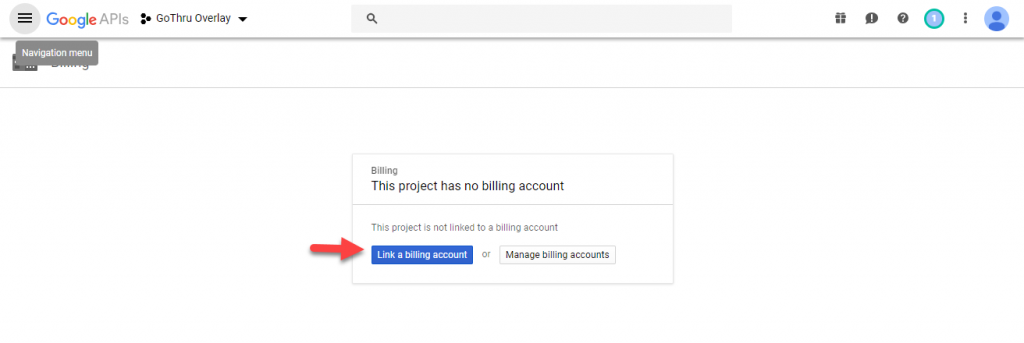
19) Click on “Create Billing Account”
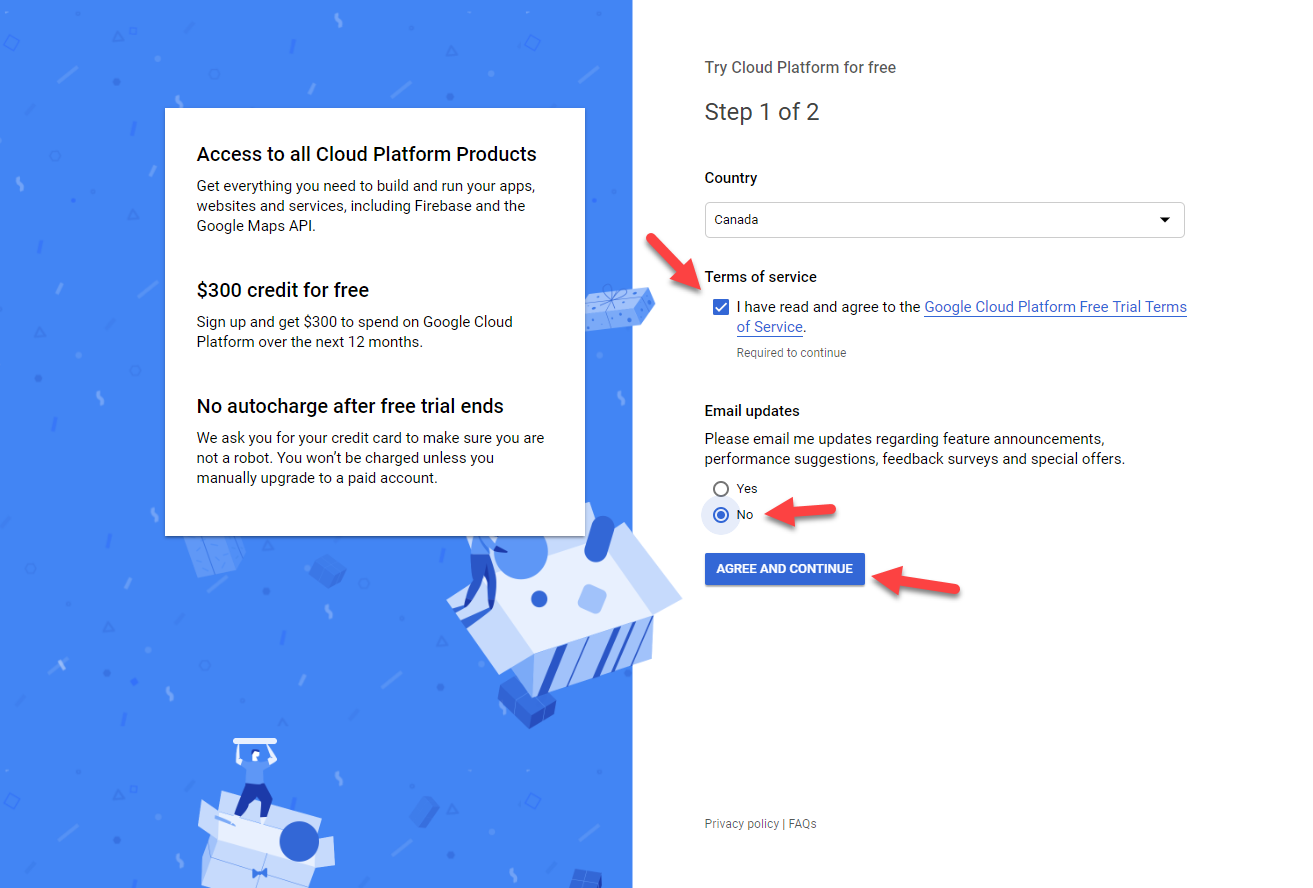
20) Accept the Terms of Conditions
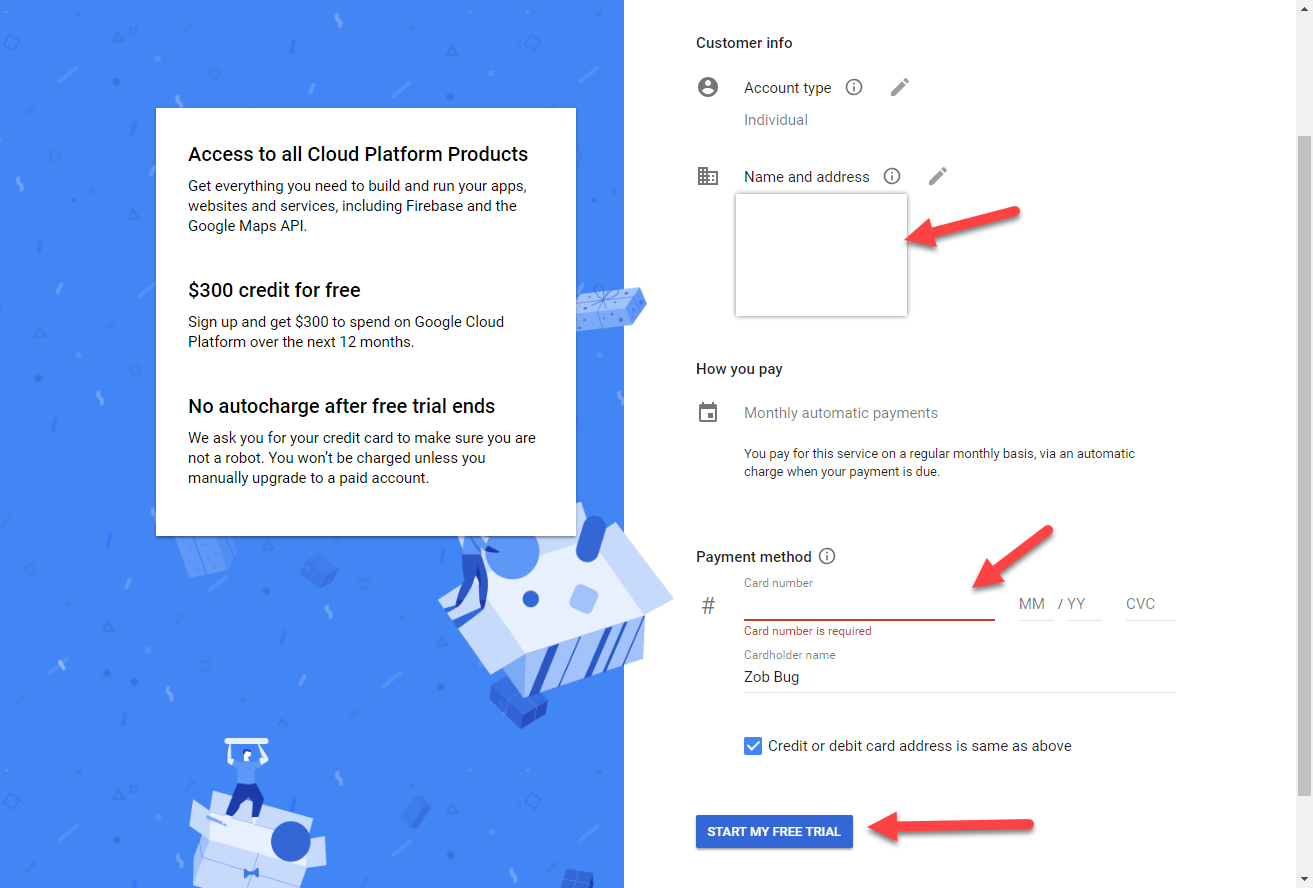
21) Fill in the form with your address
22) Fill in the form with your credit card information
23) Click “Start My Free Trail”
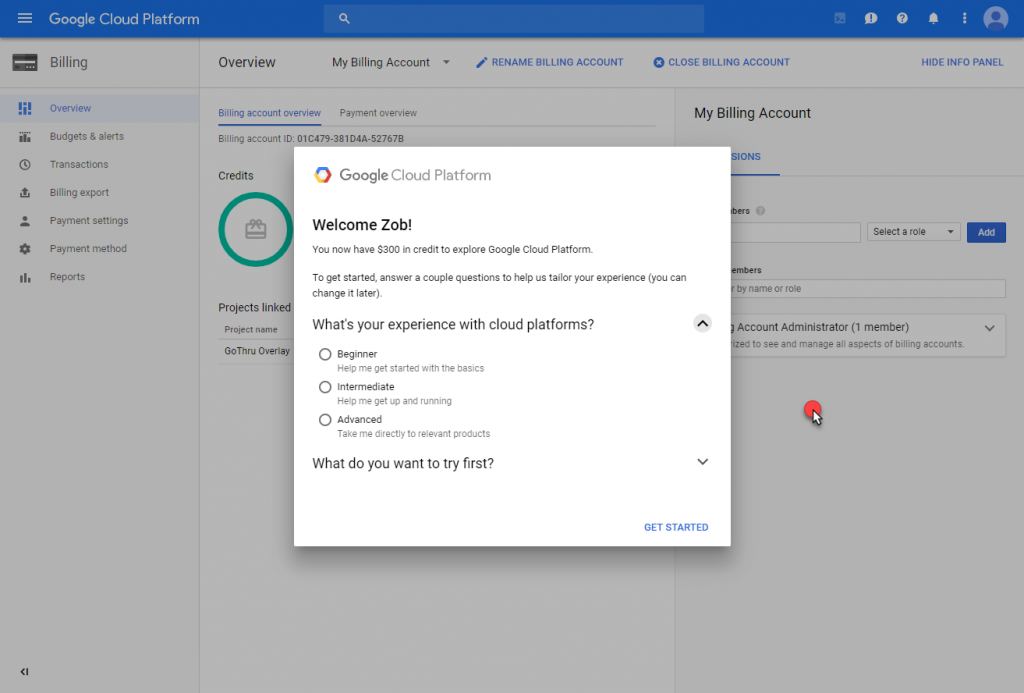
24) Jump over “Cloud Platform” by clicking on on the side
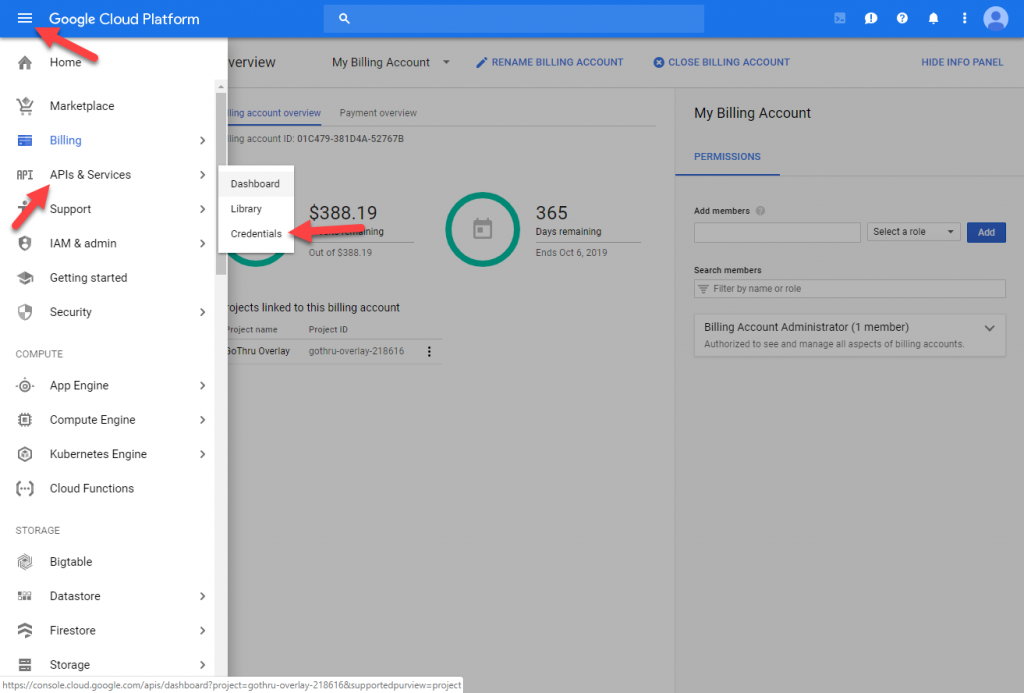
25) Go back to your Credentials by clicking on “APIs & Services” -> “Credentials”
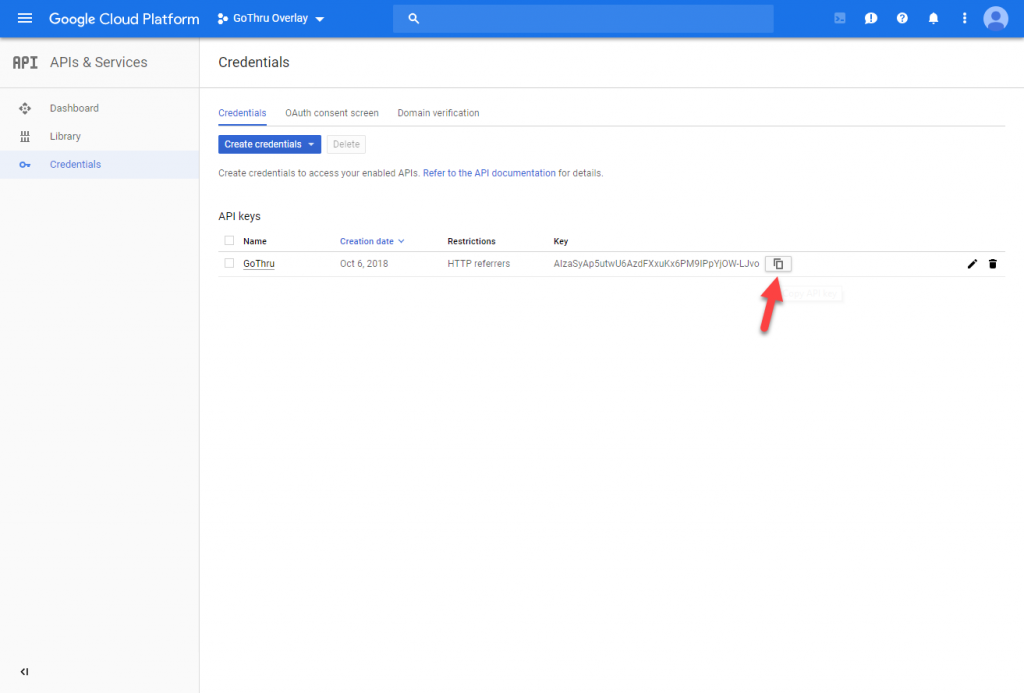
26) Copy the API key
